Extracting object identification results and cropping images using MMDetection

I have been doing a little bit of computer vision recently, and this is mostly sparked by my own capstone project—a fancy name we impart on our final year project—on gait recognition. Recently, I have also been playing around with the Hateful Memes Classification dataset. It is an interesting problem that challenges even the state-of-the-art ways we do multimodal classification. Multimodal here means that we are learning using more than one mode (i.e. learning text and image simultaneously).
One of the experiments I am doing with this dataset involves extracting data from the image using pretrained models. I want to get the object classification and the bounding boxes for the objects in order to crop the image into corresponding object images that I will input into whatever model I am using or creating. MMDetection is a good tool to start with as it allows you to use many different state-of-the-art models.
Some annoyances
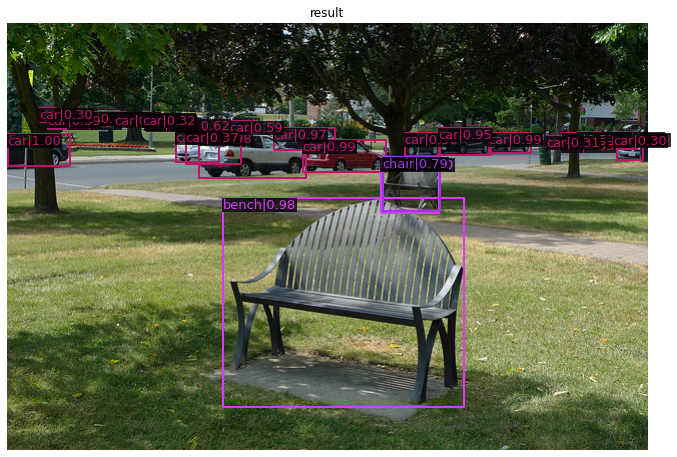
You see, there are many tutorials out there for this. Even MMDetection themselves have a pretty great tutorial on how to use the tools. However, something is nagging me. I want to get the results as a list or a hash (dictionary in Python), but all the tutorials I have seen only include the show_result_pyplot() function based on the results that outputs images like below.
The gist of the tutorials I have seen usually will load a model and configuration file which is then passed into the inference_detector() function. The result that comes out of that function is passed into show_result_pyplot() without really explaining what the result is. I might be a little bit blind in reading the documentations, and I do believe that we can probably infer a little more information from there (I still have a lot to learn, I suppose), but I struck gold when looking through this issue on MMDetection's GitHub page.
Finally, how to parse the results
Specifically, I took a look at the show_mask_result() function written by kellenf. After dissecting what they wrote, I found out a few important things when parsing the results from inference_detector() as summarised by the lines of code below (assuming you have done the previous steps as outlined in the tutorial). In the end, we will get the class labels and the bounding boxes.
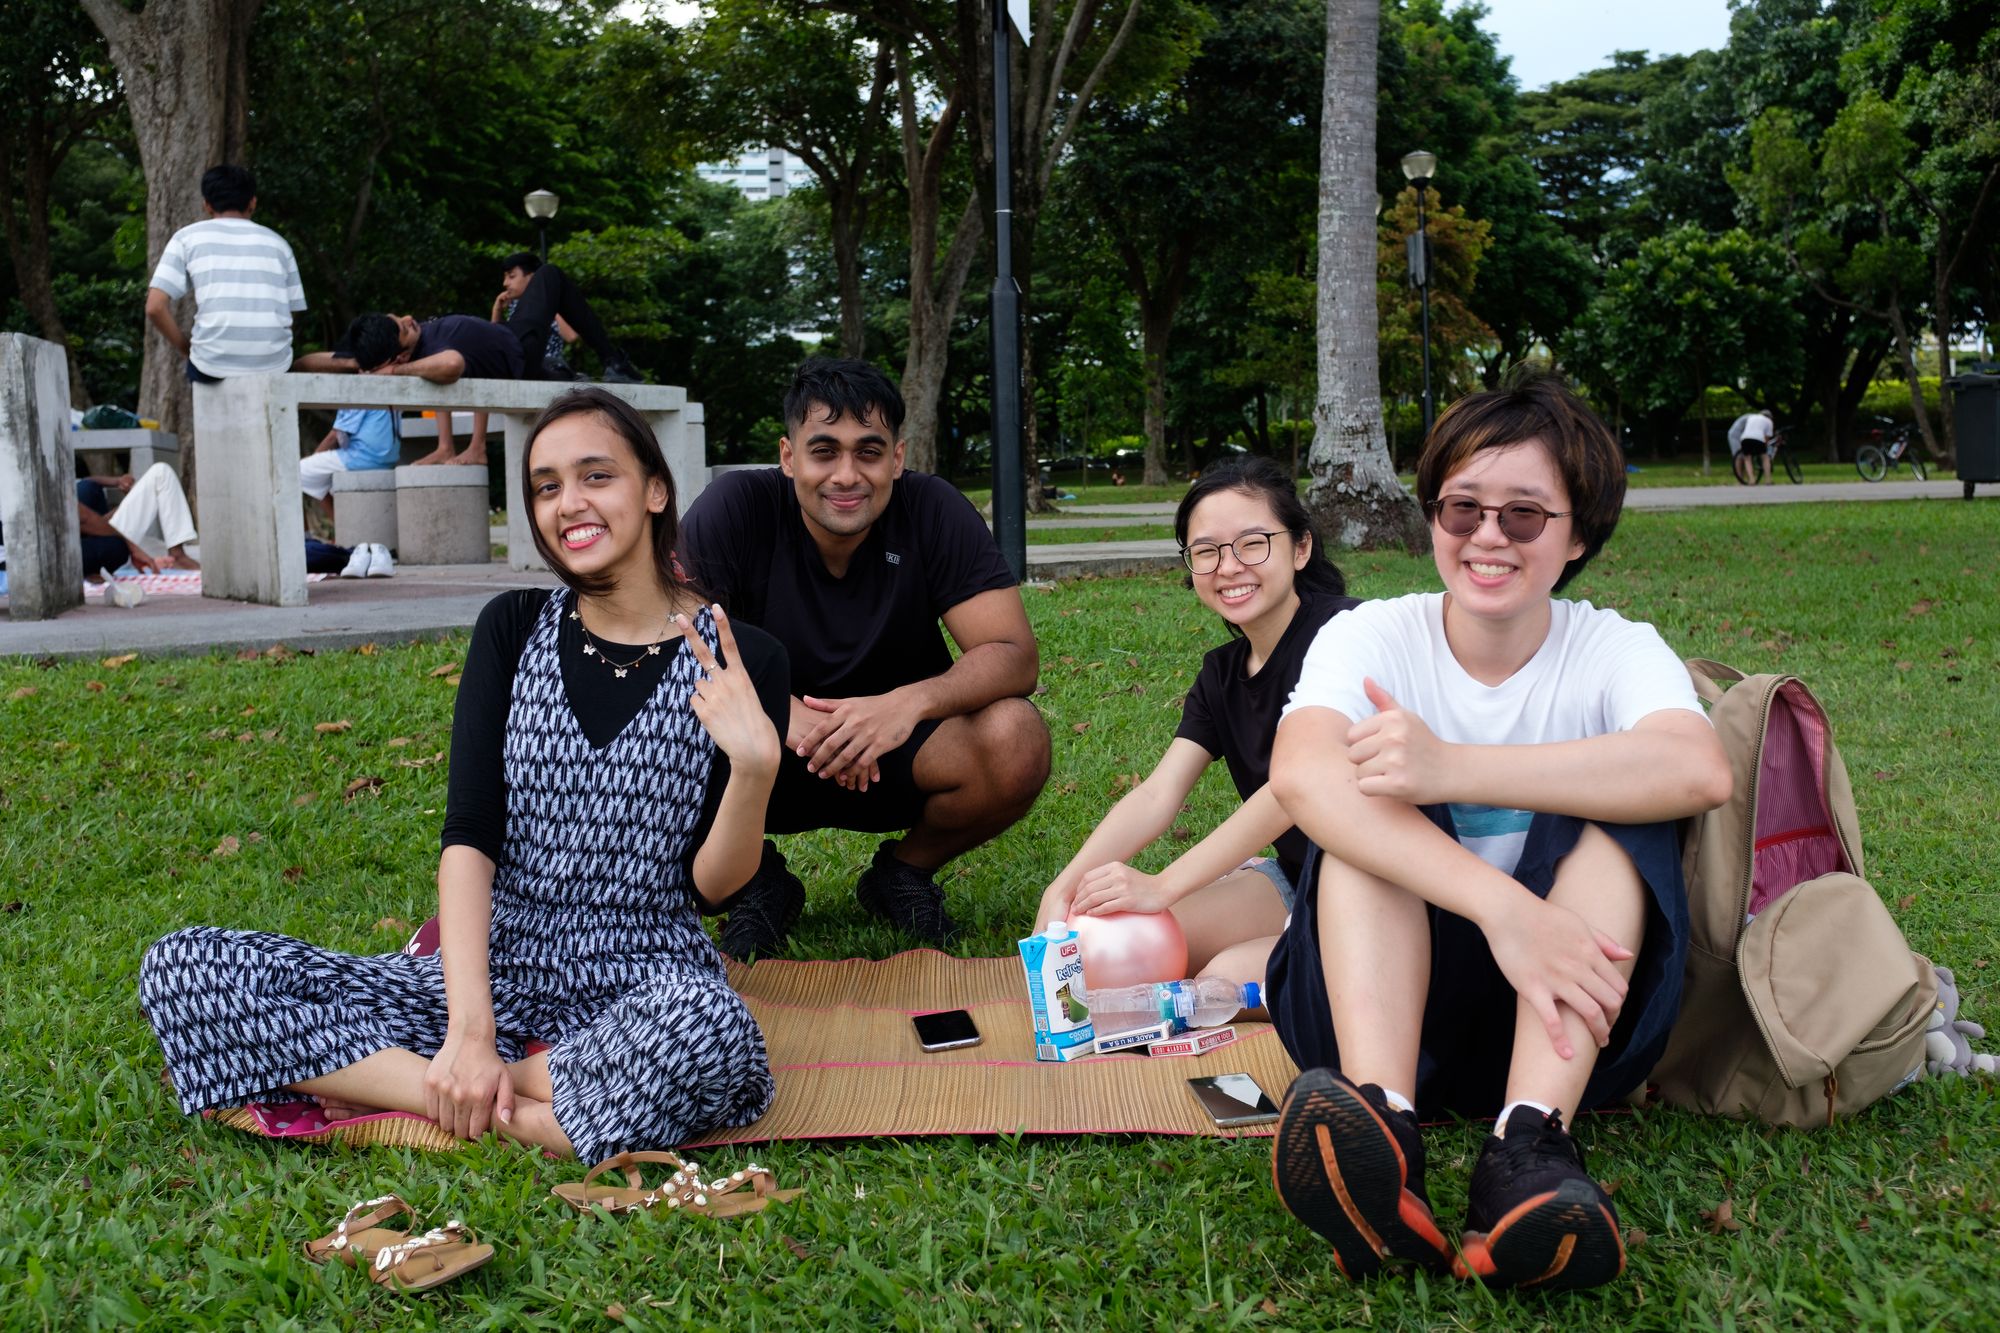
Let us take a recent picture of my friends I took and see what kind of objects it can detect. I am using the TOOD model to do the object detection.
I run the image through the normal process using inference_detector(). Afterwards, we use the code below to parse through the results.
The result that we get from an object identification model can be directly used to find the labels and bounding boxes. For instance segmentation models, we will have a second dimension that denotes the segmentation results.
The first line deals with extracting the basic structure. Object detection methods do not require this, but this is a good reminder for me that there can be a second dimension depending on the model, which I will write as below.
bbox_result, segm_result = result

The second line takes the fact that bbox_result is a sparse list of length 80, same as the number of classes in the COCO dataset it was trained on. Hence, each element's (an array) first shape dimension within the list will denote the number of times the class appears in the picture. We get the shape and fill it up with the class number using np.full(). We take advantage of enumerate() to get a hash of bbox_result (a list).
The third line helps us reduce the sparsity since we have got the classes that were detected. We concatenate to reduce the empty arrays.
The fourth line is to use the bbox_result and squash it from a sparse list of arrays into just one array.
We use bboxes (particularly, the last element of each array) to filter out the low confidence detections based on a certain threshold (0.3 in this case). We get the indices labels_impt, the class names through mmdet.core.get_classes(), and we get the actual results through labels_class.
['person',
 'person',
 'person',
 'person',
 'person',
 'person',
 'person',
 'person',
 'person',
 'person',
 'person',
 'person',
 'bicycle',
 'bicycle',
 'motorcycle',
 'bench',
 'bench',
 'bench',
 'backpack',
 'baseball_glove',
 'bottle',
 'cell_phone']
Cropping the image
We now have the labels_class and bboxes that we can use. For instance, we can crop the image using these data.

Conclusion
Well, I am not sure if there is a more efficient built-in way to do this (probably a data pipeline thing, but I am not too sure), but I hope this helps if you are doing something simple and want to get a quick result out of MMDetection. Really thankful especially to the good people on the linked GitHub issue.
If you have found anything good that can replace my method, or any feedback or questions, please comment so down below or contact me privately through my email or website.